So I intended to start this blog 2 years ago, and today is the day! Bare with me as I start this new journey. Over the past 2 years there have been many DIY projects that I wanted to share so I’m going to try to recall how they got accomplished and add them as I can.
Lets start this with a more recent project. My sister and I were in love with this dresser on Pinterest
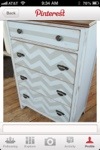
She really wanted one like it for her nursery to use as a changing table. The trick with this type of chevron is finding a dresser with drawers that are completely flat and level on the surface. I found this little gem on Craigslist for $30.
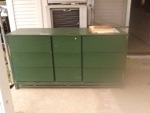
Ok i actually paid $40, because I was supposed to buy a $10 table from the seller also, but it was gross and i didn’t have room for it and after having a “Silence of the Lambs” moment in this weird neighborhood (seriously the neighbors had crazy signs about the death of innocent children and I was thinking “these people are going to wear my skin”), I thought it best to pay for the table and never come back to get it. Besides, even $40 is a steal for a solid wood buffet. Ugly? Yes! But she has all the right lines for the look I wanted.
So I ran into a LOT of problems with this piece, she quickly became my nemesis. I was being lazy, as I often am and decided to just sand down some imperfections in some areas instead of the whole thing and I didn’t prime, big mistake! Paint was peeling and I had to use a lot more spray paint than I originally intended.
I started out by “staining” the top of the piece. I say staining but i really just paint on layers of 2 different stains until i get a wood grain look in a color i liked. Then i laid out all of the drawers that I was going to do the chevron pattern on together ( I also did a striped pattern on the middle drawers) Taping chevron is tricky! I measured the whole length and width of the drawers together, then divided it by 5 inches (the measurements weren’t even so it was more like 4.75″) then, in chalk, I marked a grid. That makes it easier to tape off. I will post an in-depth tutorial on painting the pattern when I do my next chevron project. Until then I will give you the tutorial that I used, Amanda Brook has a great video how to make a chevron pattern
Ok, so after taping the pattern, I spray painted the entire dresser in an off-white color, when I took the tape off, I was left with this.
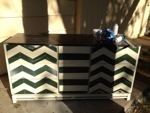
So now that I’ve got the pattern it’s a lot easier to tape off again to paint the other color. I thought I wanted to do a light gray, but it turned out very lilac.
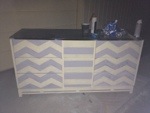
That might be great for a little girls room but it was not what I was going for. So I thought antiquing it might change the color. It did…
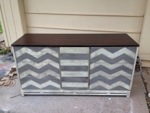
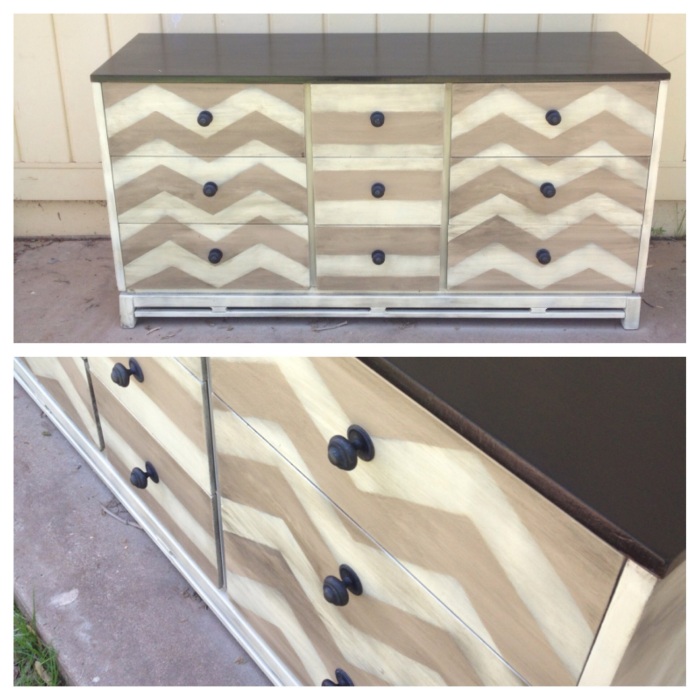
I just wasn’t loving it though, so I taped it off again and went with a taupe. Loved it, antiqued it, then realized I needed knobs. The dresser had pre drilled holes for a pull with a 3/4″ center-to-center. They don’t make those anymore, don’t even try to look for them. But seeing as how I had painted this thing more than I wanted to already, I didn’t want to fill the holes, drill a new one and paint and antique it again (you see how lazy I am?) so I ordered knobs off of amazon that had a backplate big enough to cover the existing holes. I had my husband drill new holes in the center of the existing ones and I added the knobs.
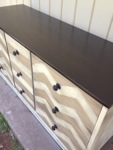
I used 2 coats of Minwax finishing paste to protect it and voila!
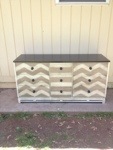
I thinks she’s pretty awesome! And she’s the perfect project for my first blog. 🙂

Love this!! Such a great way to add some texture into a room. It would be cool to see the chevron mixed in with the pieces already in the room.
LikeLike
You’re so right! She has chevron in the crib bedding and as matting for a couple of pictures. It’s really looking cute 🙂
LikeLike
That came out great! Can’t wait to see what else you’ve done.
LikeLike