So not technically the royal couple. But they sure are cute. About a year ago I sold this cute little coffee table to a really cool chick.

She recently contacted me about purchasing some end tables for her bonus room (she is doing a “world-traveled”/maps theme and I think it is going to be so cool) I sent her some pictures of what I had and we decided on these basic black beauties.


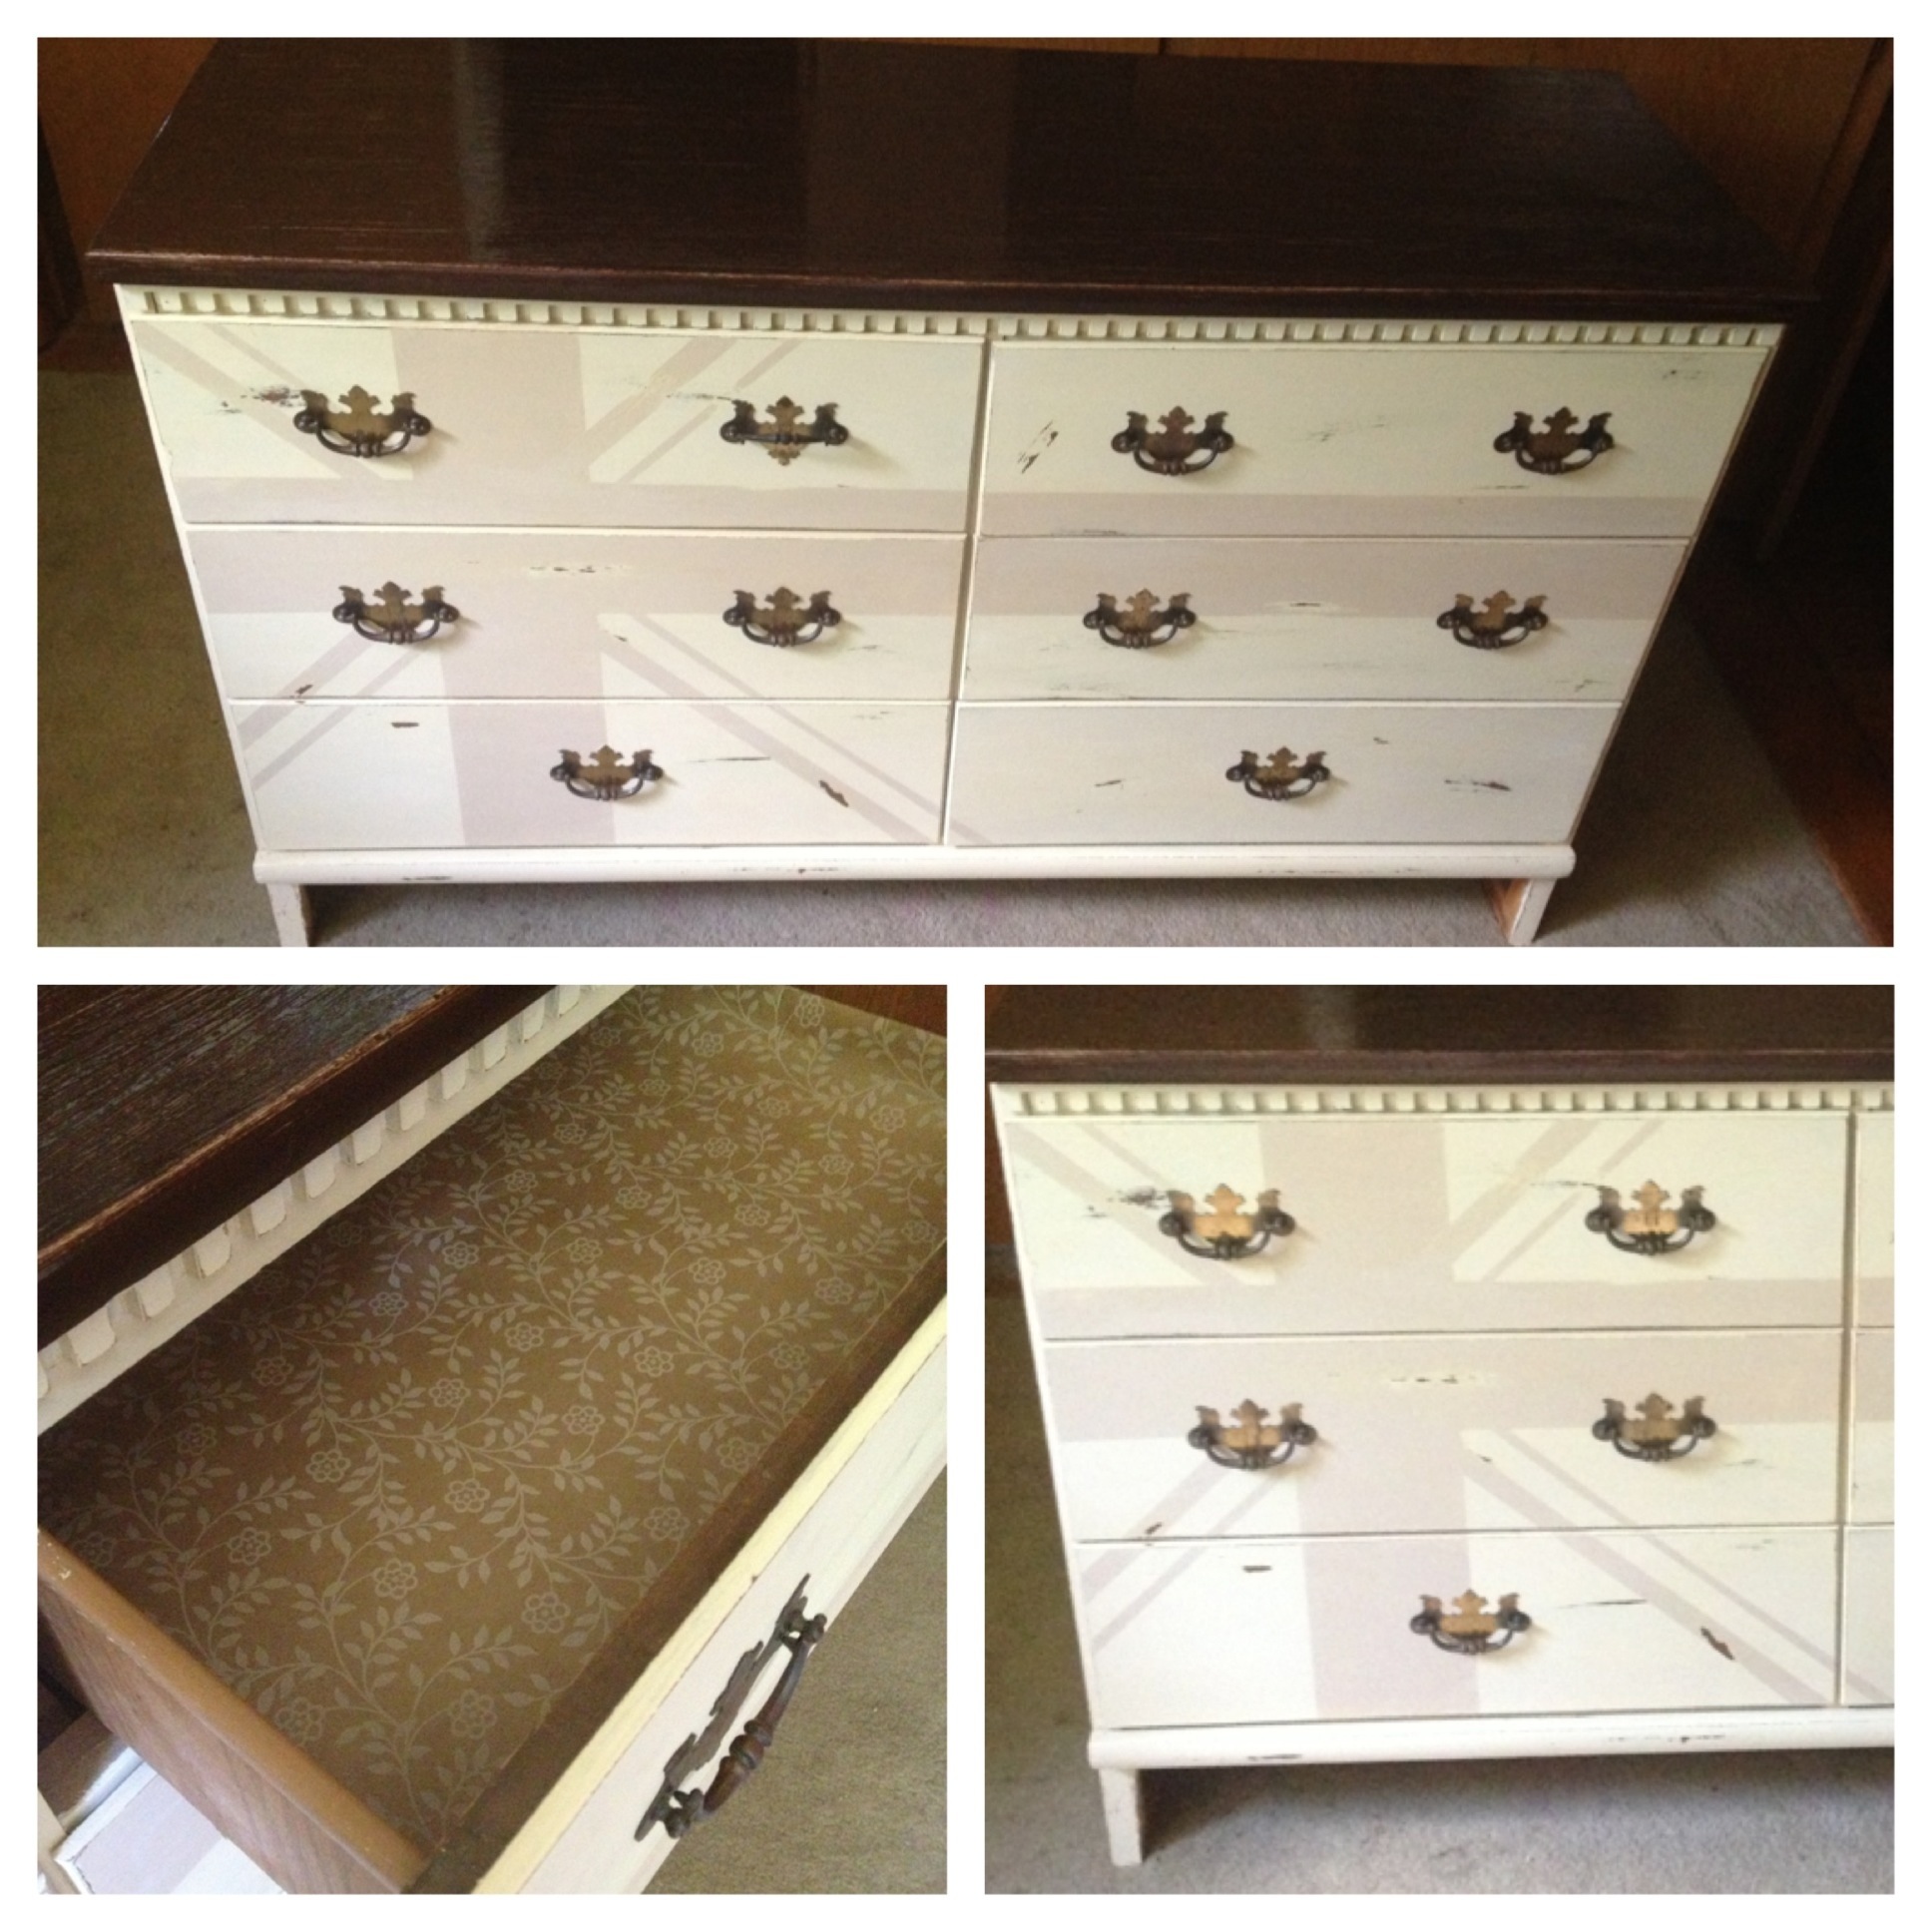
After some discussion I found out that her husband is from the UK. Ummm, hello I just rocked a Union Jack dresser! so we agreed on a cute little map table and a Union Jack. (There really wasn’t much discussion, we were pretty much on the same page…she totally gets me)
I started googling images of vintage maps and I found a really cool one of France divided into kingdoms. I sent it to my local UPS store for a large print. They are super fast and super cool and pretty reasonably priced. I ordered a 20″x25″ print on heavy duty, thick paper and it cost around eighteen dollars. While it was printing I sanded down the top of the piece where the map would be. I wanted a smooth clean surface for it to stick to. I left the paint on the rest because it was smooth and I wanted it to show up underneath when I distressed it. I mixed up a pretty blue-green chalk paint and went to work painting and distressing, then I put on a coat of clear wax followed by my homemade dark wax.

 When the print came in I lightly coated the back of the map with a spray adhesive and placed it on top of the table, smoothing out any air bubbles. I let that sit for a day before I applied two coats of mod-podge to the top. When you use mod-podge the paper can stretch and expand, so I trimmed off the edges with a box knife.
 After it dried I applied a coat of dark wax to the top to age it a bit. Frenchie is quite a knock out!

Jack is a looker too. I really had fun painting this piece and going literal on the flag. I started out lightly sanding and priming the whole table then I mixed up a light navy chalk paint for the base of the top and for the drawer.

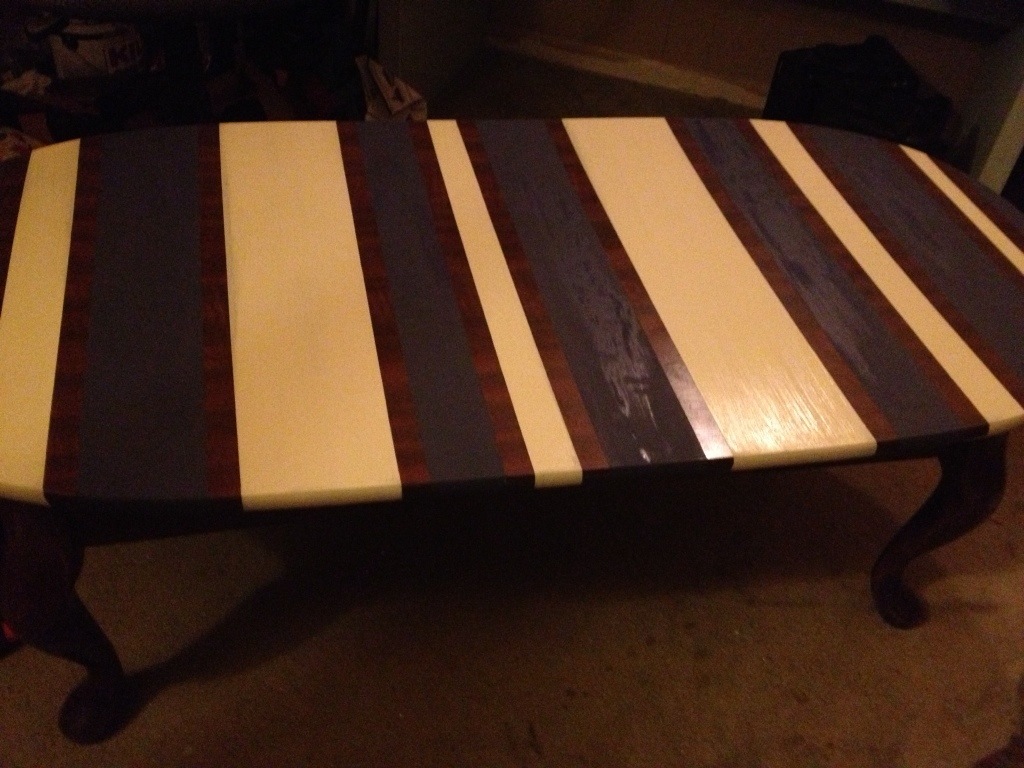
 I applied a clear wax (Minwax finishing paste) before I taped off the pattern to make sure the paint wouldn’t peel off with the tape. Ok the taping is really hard to explain so I have lots of pictures! I started by measuring the overall stripes. (The big ones where I was going to paint the white.)
 I made them about 5″ wide. Then I used my box knife and ruler to cut off the excess tape to leave the pattern to be painted white.


 Then I taped off for the red stripes. Where I put the tape would be where the white would stay.


 Cool, except it looked a little weird. So I did some more research and realized that the diagonal stripes were smaller in width than the others. So I decided to shave an inch off of them by taping near the edges and painting over them in navy again.


 Much better. it’s important to know that after each color I painted, I lightly sanded and added a clear coat of wax to keep the paint from peeling off. I painted the body of the table in my white chalk paint then I distressed the whole piece (really heavily on the top) before applying two coats of dark wax and adding the cool rope-like drawer pulls.

 Frenchie and Jack make a great couple!